创建库表
更新时间:2025-04-09
概述
本章节介绍如何连接向量数据库,根据业务需求创建需要的库表信息。运行本章节所提供的示例代码,您将初步了解向量数据库的库表创建的能力。
前提条件
- 已成功新建数据库实例。
- 根据 SDK 的准备指引,完成 SDK 的准备工作。
- 实例未被销毁。
获取访问信息
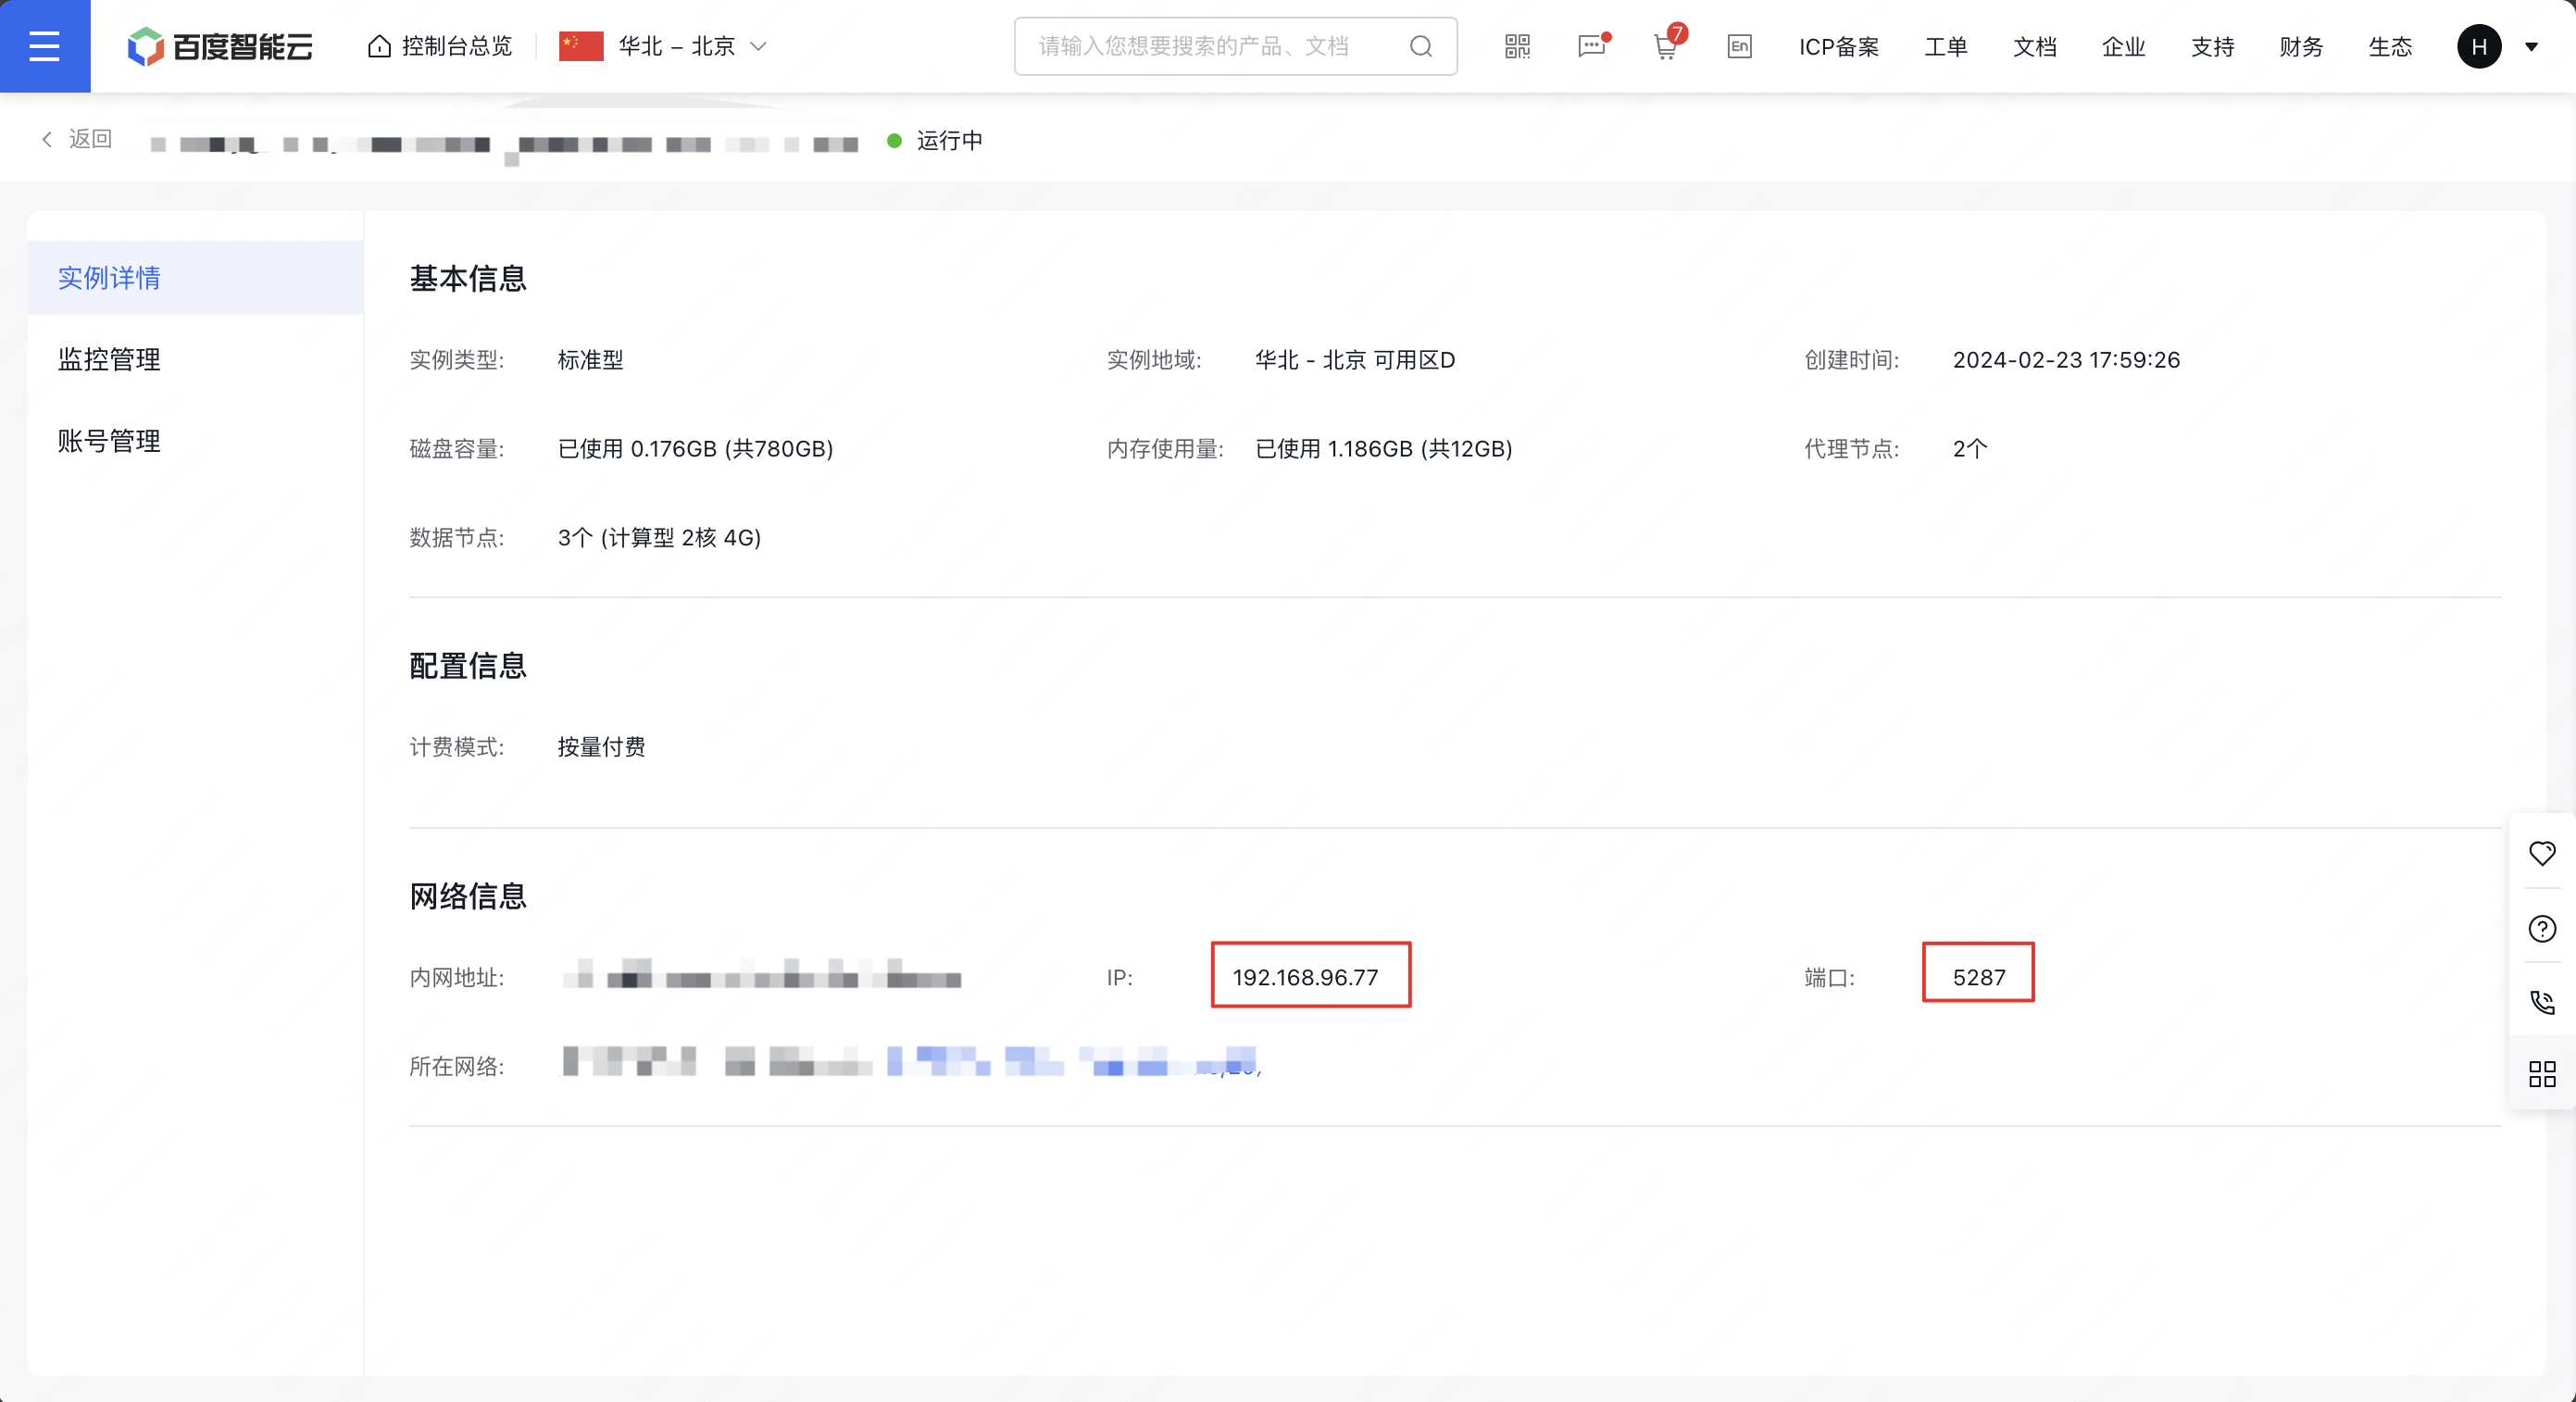
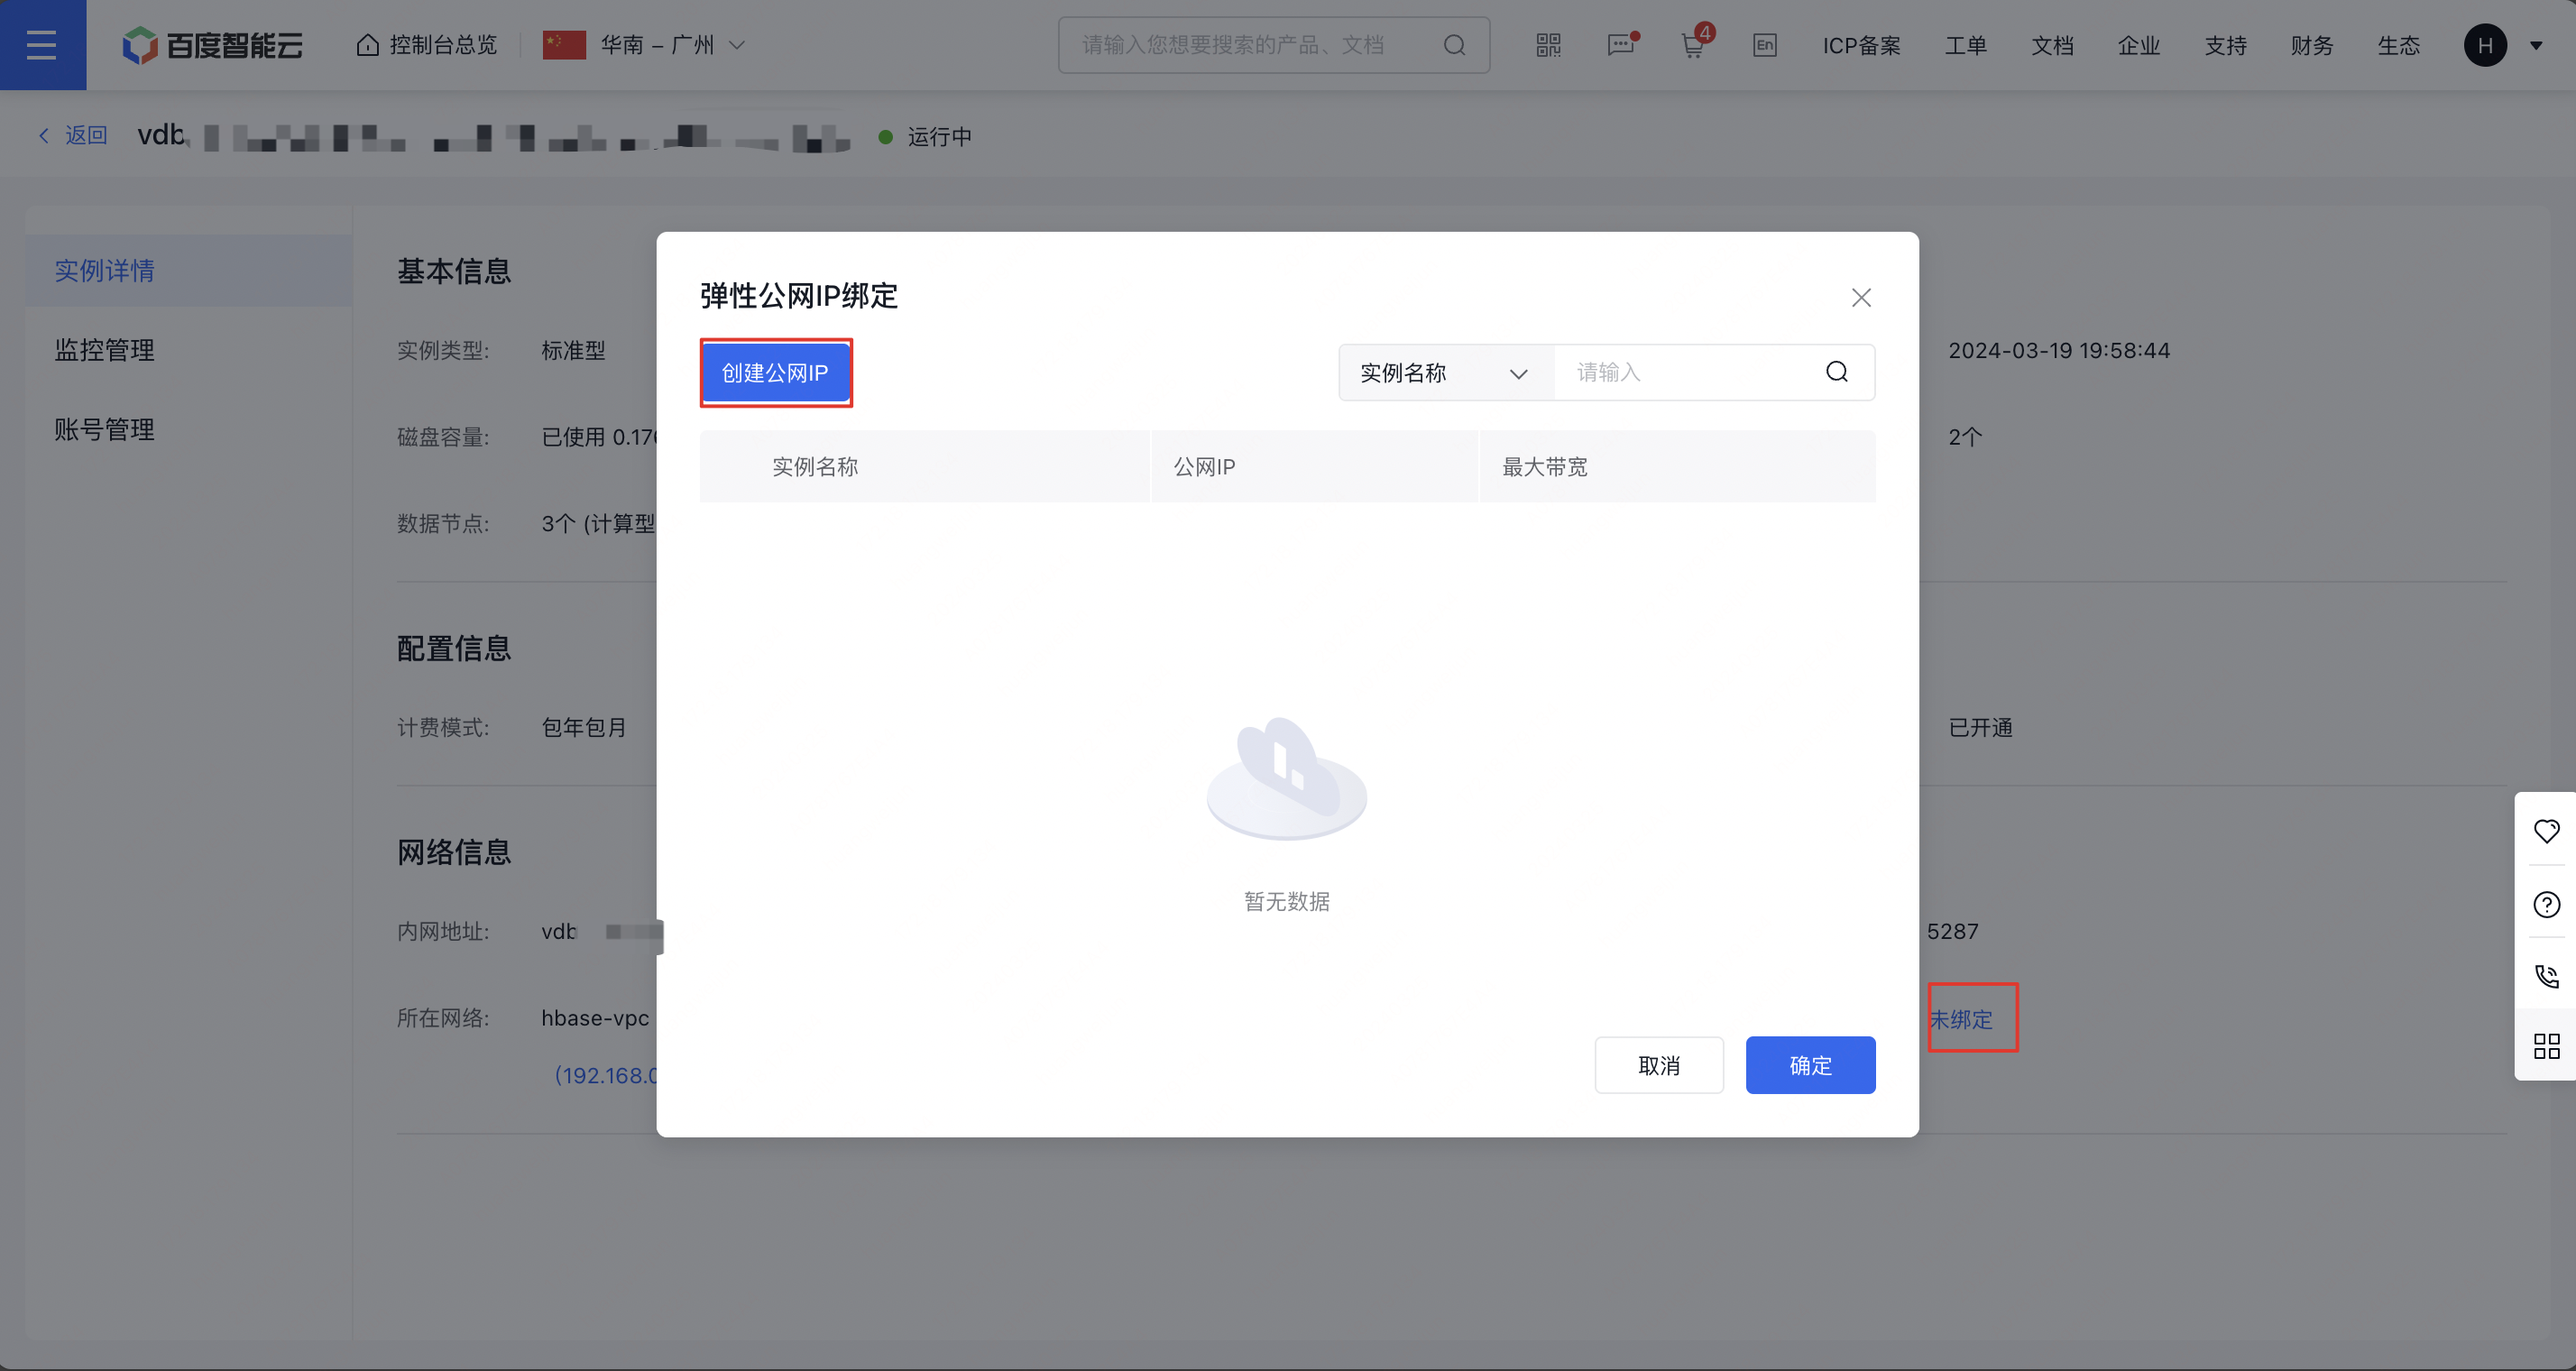
从"实例详情"页获取访问地址 IP 和端口信息,目前连接VectorDB 有两种访问方式:
- 在 VPC 内通过内网地址或者 IP 进行访问,如下图所示

- 在公网访问,通过绑定公网 IP 进行访问。流程可参考:开通公网 IP,如下图所示

绑定后即可进行公网访问。
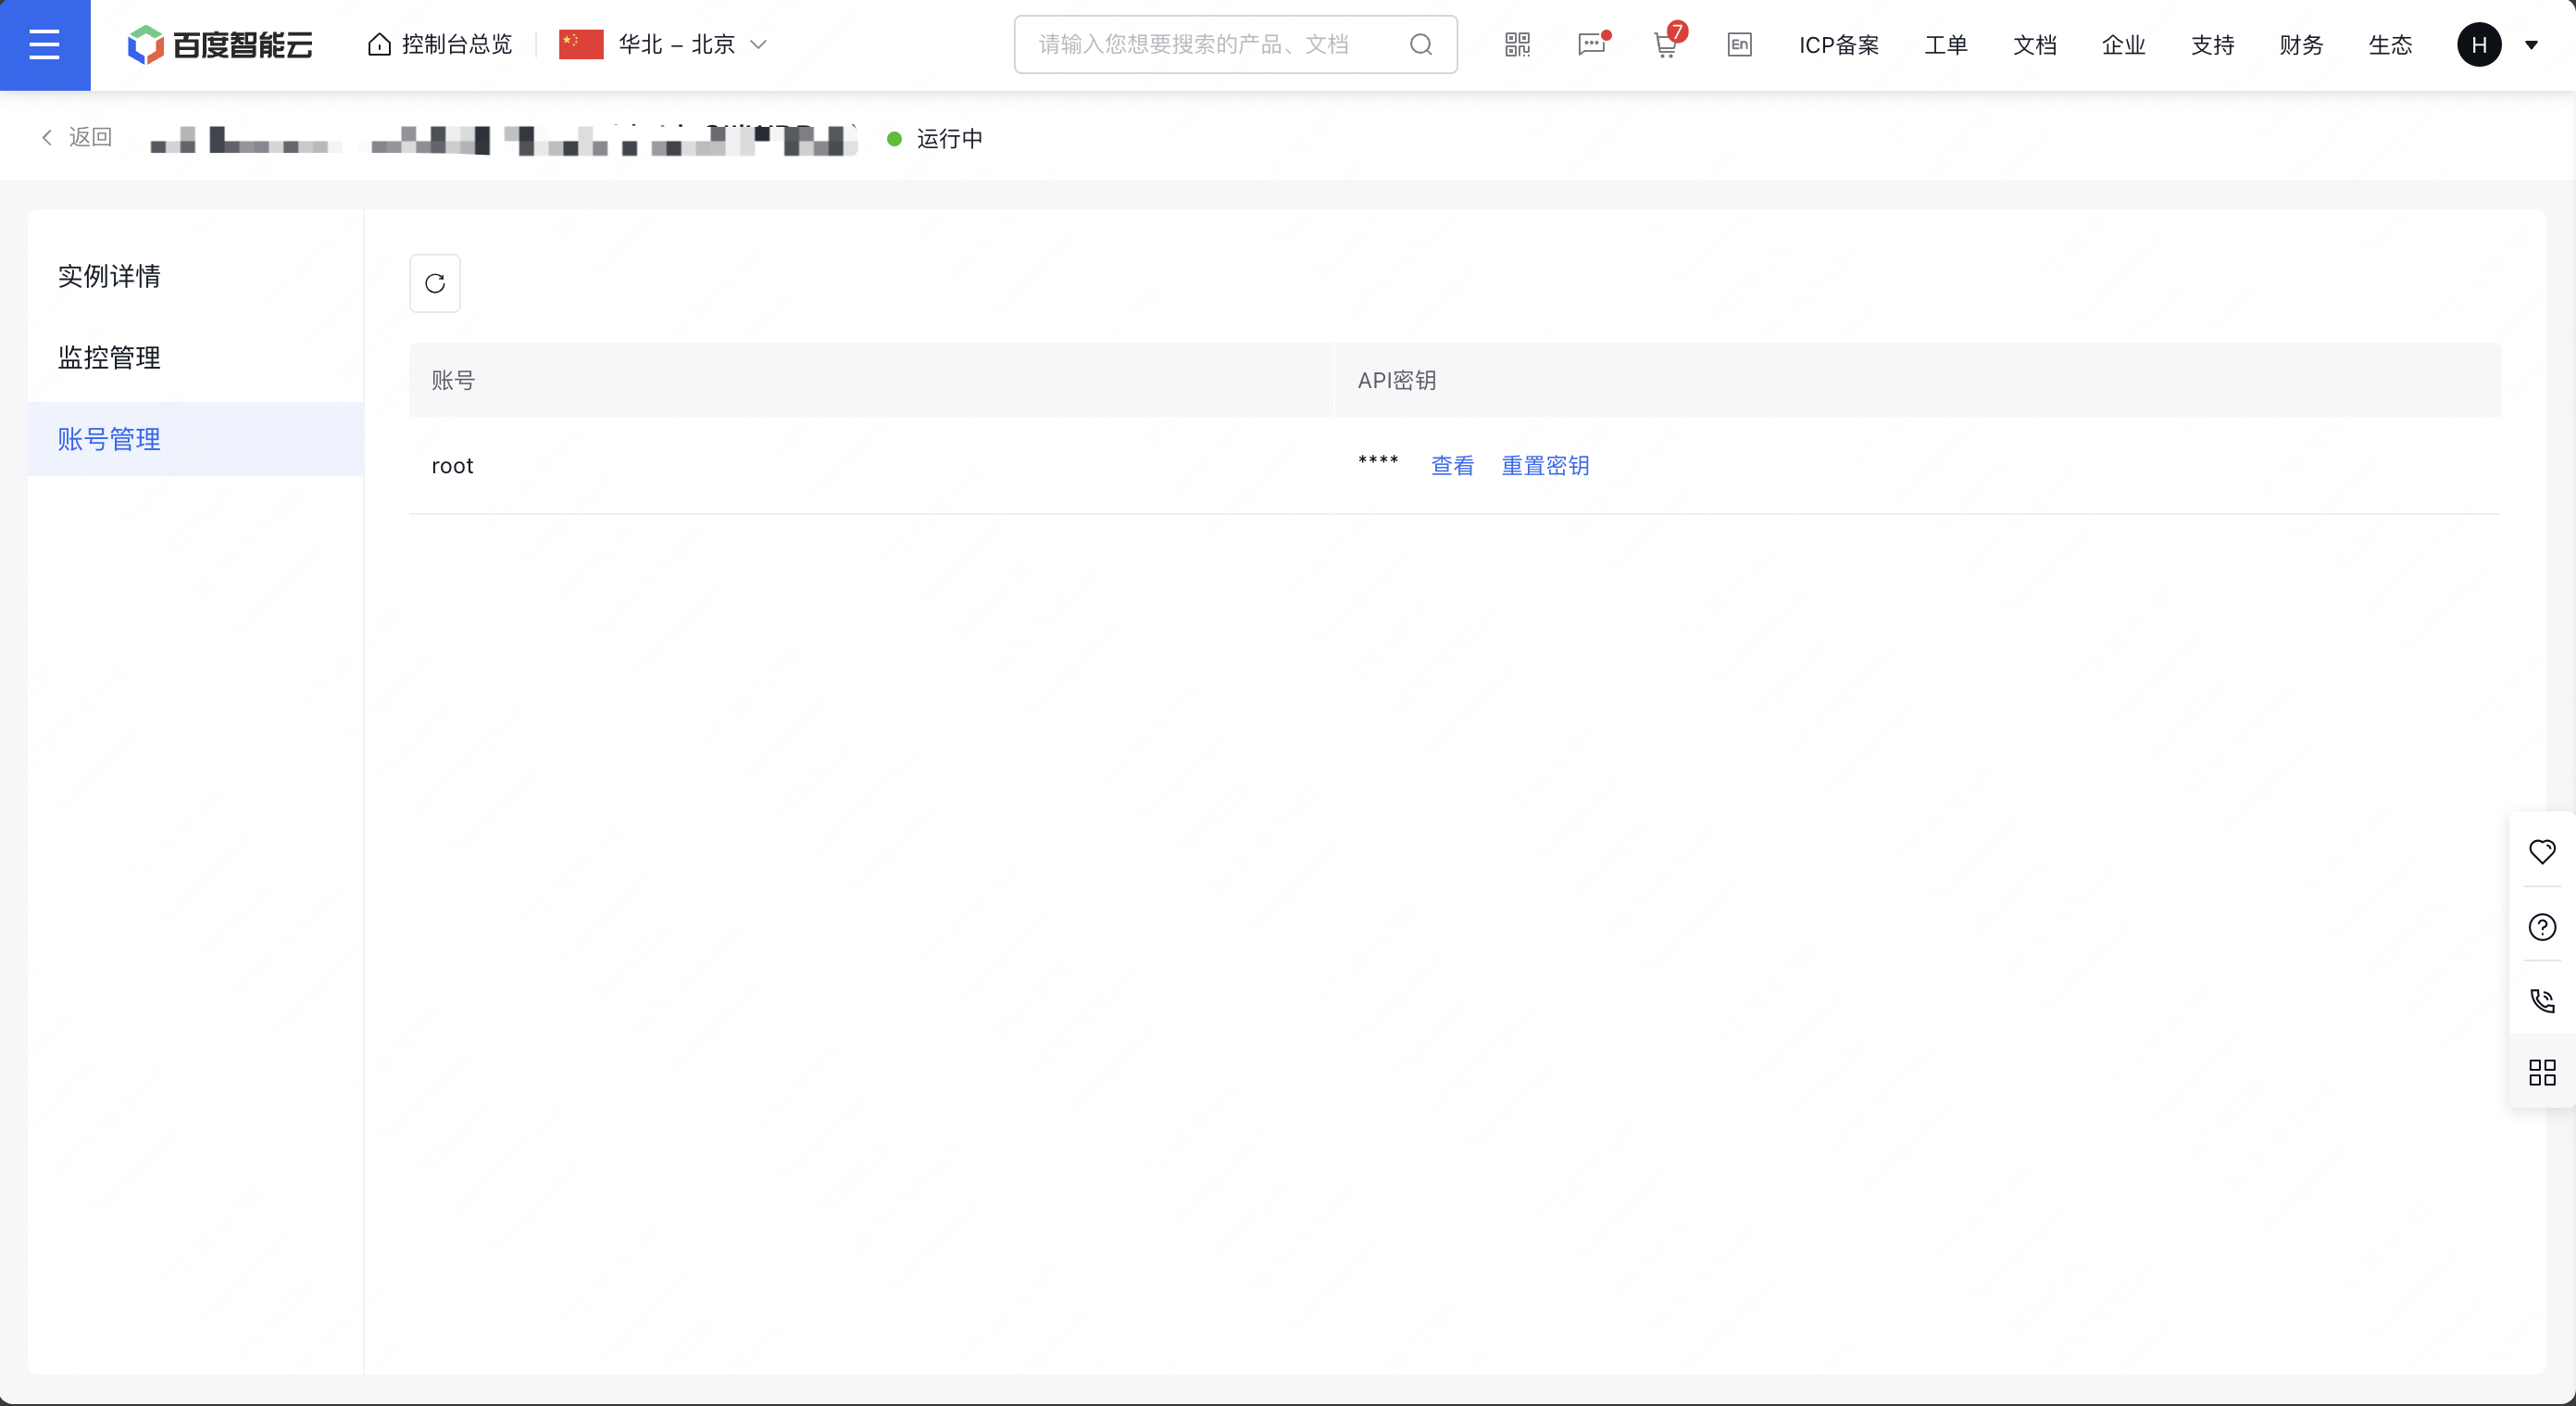
获取访问的账号信息
从"账号管理"页中获取访问的密钥信息,如下图所示

创建数据库
新建 Database,用于存储向量数据、原始文本。
Python
1import pymochow
2from pymochow.configuration import Configuration
3from pymochow.auth.bce_credentials import BceCredentials
4account = 'root'  # 账号信息
5api_key = 'your_api_key'  # 密钥信息
6endpoint = 'you_endpoint' # example http://127.0.0.1:5287
7config = Configuration(credentials=BceCredentials(account, api_key),
8            endpoint=endpoint)
9client = pymochow.MochowClient(config)
10db = client.create_database("db_test") # 创建的数据库名称
11client.close()
创建表
在 db_test 库中新建一个 db_test 的表。
Python
1import pymochow
2from pymochow.configuration import Configuration
3from pymochow.auth.bce_credentials import BceCredentials
4from pymochow.model.schema import Schema, Field, SecondaryIndex, VectorIndex, HNSWParams
5from pymochow.model.enum import FieldType, IndexType, MetricType, TableState
6from pymochow.model.table import Partition
7
8account = 'root'
9api_key = 'your_api_key'
10endpoint = 'you_endpoint' #example http://127.0.0.1:5287
11
12config = Configuration(credentials=BceCredentials(account, api_key),
13            endpoint=endpoint)
14client = pymochow.MochowClient(config)
15
16db = client.database("db_test")
17
18fields = [] # 表的字段详情列表
19fields.append(Field("id", FieldType.STRING, primary_key=True,
20    partition_key=True, auto_increment=False, not_null=True))
21fields.append(Field("bookName", FieldType.STRING, not_null=True))
22fields.append(Field("author", FieldType.STRING))
23fields.append(Field("vector", FieldType.FLOAT_VECTOR, dimension=3, not_null=True))
24indexes = [] # 表的索引详情列表
25indexes.append(VectorIndex(index_name="vector_idx", index_type=IndexType.HNSW,
26    field="vector", metric_type=MetricType.L2,
27    params=HNSWParams(m=32, efconstruction=200)))
28indexes.append(SecondaryIndex(index_name="book_name_idx", field="bookName"))
29
30table = db.create_table(
31    table_name="book_vector",
32    # replication=1, # 免费版是单节点架构,需设置为1
33    replication=3, # 标准版是多节点分布式架构,设置值不应超过数据节点数量
34    partition=Partition(partition_num=3),
35    schema=Schema(fields=fields, indexes=indexes)
36)
37
38client.close()
这样你就完成了 db_test 库和 db_test 表的创建,下面进入数据的简单读写操作,读写数据。
